Greetings all,
I know these are tough times. The fear is a demon we must fight daily. We are all scared to catch Covid19 and die, but really, we must focus on being healthy and readying our immune systems.
I recommend using the Turmeric Tonic I posted a year ago. Add the garlic and ginger and have the whole family take it as a shot each day, first thing in the morning and last thing at night.
Eat fresh salads daily, and add lime juice and finely grated ginger to them. Ensure you eat a rainbow salad - pack it with all the colours of the rainbow and add flax meal, chia, hemp, sunflower and pumpkin seeds for added nutrients.
Add seamoss gel to all your cooked meals and smoothies.
Make soup regularly, including garlic and ginger and seamoss. It's a great way to hide these ingredients from the children. Store in the freezer in case anyone gets sick.
Hydrate as much as possible. Water, coconut water, tea, smoothies, fresh juices.
Drink turmeric, ginger or garlic tea frequently. Especially after you go out, when you come in, make sure to drink a hot liquid.
Get your vitamin C however you can, lots of fruits and veggies contain it. Also boost up with vitamins such as elderberry if you have it. Oregano, apple cider vinegar, lemon balm, ginger and garlic are also great antiviral foods you can use. Green tea and cinnamon are also mentioned.
Wash your fruits and veggies well with vinegar, colloidal silver, or baking soda, or a veggie wash. Clean your groceries with disinfectant before you store them away. I use a cloth with regular disinfectant.
NO DAIRY FOODS. Dairy encourages illness and inflammation. Use nut mylk instead of dairy.
Eat alkaline foods. Leave out the junk! No disease can thrive in an alkaline body.
Do not smoke tobacco, don't smoke period. This virus affects the lungs, now is not the time to smoke excessively now that you're home. Be mindful that you must have good lung health. Many who smoke daily have a lingering cough. Try your best to soothe it with honey and any warm liquid like lime or ginger.
Exercise at home, and get Vitamin D daily to keep your energy levels up and your mind positive.
Use humidifier or inhale steam (with tea tree oil, eucalyptus oil or other oil if you have it) regular to keep the throat moist. If you have a rosemary plant, boil it in a pot of water and walk through the house to cleanse out the air and germs in the air.
I hope these tips have helped. Controlling your diet is one sure way you can have some type of control in this time of uncertainty. Even if the virus is contracted, a healthy body will beat it.
Stay home, stay clean and stay healthy! I pray for you all. JAH Rastafari be with I and I as the enemy seeks to destroy our beautiful race and home.
Love
Ila
Sunday, 5 April 2020
Wednesday, 12 February 2020
Blender Blackbean Burgers
Greetings,
This blackbean burger recipe is one that I created recently because I was having trouble with them falling apart. Also I wanted a cheaper option rather than using potato and quinoa like in my older recipes posted here. This one I prefer and have had great success with them being light, tasty and firm (no falling apart). I eat these burgers in the morning with salad and quiche instead of with bread. But they are great on their own or with a nice dipping sauce of your choice. You can also make them into balls if you want an appetizer or to serve with pasta. I make them small like in the palm of my hand or big and flat. The shape or size is up to you!
Note that I use my food processor but I am sure a blender will work just fine.


Ingredients:
1 1/2 cup dry black beans + 1 tsp baking soda (you can use 2 cans if you wish)
1 small onion
1-2 pimento peppers
1 clove garlic or 1 tsp garlic powder (I use powder if I have it)
1/2 tsp pink salt
1/2 tsp turmeric powder
1/2 tsp cumin powder
1 tsp dried basil, thyme or Italian seasoning flakes
1/4 tsp paprika
1 spoon tomato paste
1 tbs cooking oil
1 tbs water
1/4 cup arrowroot flour or tapioca
1/8-1/4 cup flour (cornmeal works really well as it does not make the dough dry out, but if you don't use corn then use your preferred flour)
Method:
1. Add the baking soda to the dried black beans in a bowl, cover well with boiling water. Cover the bowl and allow to sit at least 1-2 hours.
2. Rinse the soaking water and then in a pot, boil fresh water. Add the beans and boil until they are soft.
3. Throw off the water and allow the beans to cool in a colander.
Or just empty and rinse the beans from the can.
4. Add all the ingredients except for the 1/8-1/4 cup of flour or cornmeal, to your machine and blend to a thick dough. I tend to chop the onion, garlic and pimento into small bits first before adding to blender.
5. Remove and place in a bowl. Cover with a clean kitchen towel and let sit 1/2 hour to an hour so that the arrowroot flour will thicken the dough. This part is important.
 All ingredients fully blended together make this paste.
6. Uncover and sprinkle the 1/8 cup of flour or cornmeal, turning into the dough with a spoon. Add the extra 1/8 cup if needed, as you start to form the burgers/patties, so that it won't be sticky, but it shouldn't be overly sticky.
The dough will stick to your palm as you keep rolling but it should not be a lot.
Makes 14 smallish burgers (size of palm of a small hand lol). It all depends on how big you make them. The number you get.
Place them on your baking sheet or pan which is pre-greased.

7. Bake at low-medium temperature 150-200 C for fifteen minutes on one side, then flip and bake another 5-10 on the other. However, once the underside is well browned I flip and place them back in the oven, then turn the oven off and allow them to completely cool in it.
Store in an airtight container in the fridge, lasts as long as you need them to! You can also freeze them if you need to, then toast them.
If you make them please drop me a comment below and let me know what you think! You can alter the seasonings per your taste. Tag me on Instagram @italpeople if you post a picture!
Be sure to follow my Ital With Ila board on Pinterest as well to keep up with when I post recipes. I also have an Ital People page on Pinterest but it needs updating!🙈 I will be sure to get on that and post the link.
Love and Health!
Ila
This blackbean burger recipe is one that I created recently because I was having trouble with them falling apart. Also I wanted a cheaper option rather than using potato and quinoa like in my older recipes posted here. This one I prefer and have had great success with them being light, tasty and firm (no falling apart). I eat these burgers in the morning with salad and quiche instead of with bread. But they are great on their own or with a nice dipping sauce of your choice. You can also make them into balls if you want an appetizer or to serve with pasta. I make them small like in the palm of my hand or big and flat. The shape or size is up to you!
Note that I use my food processor but I am sure a blender will work just fine.


Ingredients:
1 1/2 cup dry black beans + 1 tsp baking soda (you can use 2 cans if you wish)
1 small onion
1-2 pimento peppers
1 clove garlic or 1 tsp garlic powder (I use powder if I have it)
1/2 tsp pink salt
1/2 tsp turmeric powder
1/2 tsp cumin powder
1 tsp dried basil, thyme or Italian seasoning flakes
1/4 tsp paprika
1 spoon tomato paste
1 tbs cooking oil
1 tbs water
1/4 cup arrowroot flour or tapioca
1/8-1/4 cup flour (cornmeal works really well as it does not make the dough dry out, but if you don't use corn then use your preferred flour)
Method:
1. Add the baking soda to the dried black beans in a bowl, cover well with boiling water. Cover the bowl and allow to sit at least 1-2 hours.
2. Rinse the soaking water and then in a pot, boil fresh water. Add the beans and boil until they are soft.
3. Throw off the water and allow the beans to cool in a colander.
Or just empty and rinse the beans from the can.
4. Add all the ingredients except for the 1/8-1/4 cup of flour or cornmeal, to your machine and blend to a thick dough. I tend to chop the onion, garlic and pimento into small bits first before adding to blender.
5. Remove and place in a bowl. Cover with a clean kitchen towel and let sit 1/2 hour to an hour so that the arrowroot flour will thicken the dough. This part is important.

6. Uncover and sprinkle the 1/8 cup of flour or cornmeal, turning into the dough with a spoon. Add the extra 1/8 cup if needed, as you start to form the burgers/patties, so that it won't be sticky, but it shouldn't be overly sticky.
The dough will stick to your palm as you keep rolling but it should not be a lot.
Makes 14 smallish burgers (size of palm of a small hand lol). It all depends on how big you make them. The number you get.
Place them on your baking sheet or pan which is pre-greased.

This picture, the onion and other fresh ingredients were not blended with the beans.
7. Bake at low-medium temperature 150-200 C for fifteen minutes on one side, then flip and bake another 5-10 on the other. However, once the underside is well browned I flip and place them back in the oven, then turn the oven off and allow them to completely cool in it.
Store in an airtight container in the fridge, lasts as long as you need them to! You can also freeze them if you need to, then toast them.
If you make them please drop me a comment below and let me know what you think! You can alter the seasonings per your taste. Tag me on Instagram @italpeople if you post a picture!
Be sure to follow my Ital With Ila board on Pinterest as well to keep up with when I post recipes. I also have an Ital People page on Pinterest but it needs updating!🙈 I will be sure to get on that and post the link.
Love and Health!
Ila
Tuesday, 11 February 2020
Cashew Cheeze in Block Form
Greetings,
Giving up cheese is always the hardest part of going vegan or ital. It is part of so many favourite dishes and often we backslide because of that. Over the years I have missed it in sandwiches, pizza and as a topping for salad. Thankfully the vegan community online discovered the Japanese gelling agent agar-agar which is an all natural plant-based gelling agent unlike gelatin which comes from pigs. So with agar you can make jellies and gummies and all kinds of desserts and now cheeze!

With this recipe you can make numerous small blocks of cheeze or one big block. It all depends on the size of the container or containers you use. Here are a few things to note:
*OIL YOUR CONTAINERS BEFORE YOU POUR!* I cannot stress this enough, as my first go-round, I forgot this vital part! The cheeze will NOT budge as an entire block if you forget!
*Make sure you have your containers oiled and ready to go BEFORE you mix in the melted agar as the cheeze thickens immediately once blended with the agar.
* I use the bottled kind for this recipe specifically as sometimes the lime/lemon can be too tangy which can affect the flavour you get, but you are free to use your fresh limes or lemons once they are properly ripe.
*Put all the salt if you want your cheeze to have flavour!
*Your blender MUST be able to properly blend nuts right down to a paste. I use my food processor which is ideal. A Vitamix will work as well.
*If you only have agar strands you will need a Nutribullet or a blender that has a milling blade or the flat blade, to make it into a grainy dust. You need to mill the strands as fine as possible, using a pulse method instead of just letting it blend at high speed, because the agar is so light that it just flies around without breaking down. So pulse the Nutribullet - slide on and off a lot as that keeps the agar flakes to the bottom of the blender where the blade is. I hope this makes sense!
#Ingredients:
1 1/2 cups or a 200g pack raw unsalted cashew nuts (don't soak to retain the flavour)
You can also use 1 cup of cashews, but adjust the agar water to 1 cup as well.
1/3 cup water
5 tbs lemon/lime juice (4 tbs also works)
2 tbs coconut oil (I use Nariel brand which is slightly refined for cooking but still solidifies in cold temps. But I figure whatever cooking oil without a strong flavour can work)
2 1/2 tsp pink salt
1/4 cup nutritional yeast (you can omit it you don't use or have, I find it still tastes great!)
1 tsp garlic powder
(1/2-1 tbs chili flakes if you want a peppery cheeze)
Gelling Ingredients:
1 tbs agar powder to 1 cup water
OR for agar strands you need 1/4 cup of the milled strands and 1 1/4 cup water.
A small pot and spoon
Method:
1. Add all the #Ingredients to your food processor or blender and blend until a smooth paste is formed. The nuts should not be gritty any longer, though one or two grains may still be there. Stop and rest your machine as needed, and push down the paste from the sides as needed.

Leave the mixture in the blender while you prepare the agar.
2. In a small pot bring the 1 cup of water to boil and add your 1 tbs of agar. STIR CONTINUOUSLY until a thick gel forms.
OR if using the agar strands: pull apart strands and using a scissors clip them into fine pieces. Using the milling blade on your Nutribullet, mill them to as fine a dust as you can manage. This is important as it takes a while to form the gel and if the pieces are too big, they take forever to gel. Add tsp amounts of water if necessary as you keep stirring but remember not to add too much.


3. When the agar is properly melted, add it to the blender/processor. Blend until it is mixed into the cheeze. Pour IMMEDIATELY into greased container(s) and allow to cool properly. Slap the container on to the counter to make the cheeze settle properly.
4. Cover and store in the fridge to set for at least 5-6 hours, but I tend to leave mine until the morning.
You can simply scrape with a knife and spread onto your crackers or bread, or you can slice or even grate the cheeze. The more agar the firmer it will be but it will still be soft enough to spread.
My huge block lasted about 2 week in the fridge. When I make smaller blocks however, I found they should be consumed within 7-9 days.
I hope you like this one, it is certainly a favourite with every member of my family which is a huge success for me! I often have to police the poor cheeze or it will be devoured in no time! (It's expensive to make!)
Let me know how you make this recipe your own in a comment below or if you have tried it, leave a review! Tag me on Instagram so that I can see and share your creation @italpeople
Love!
Ila
Monday, 10 February 2020
Savoury Besan Crackers
Greetings,
Giving up wheat flour in the form of crackers and bread or wraps is hard! But I am determined to go gluten free this year and have therefore pulled back out my old besan flour recipes and have given them another go, revamping my crackers and wraps (the wrap recipe to come when next I make, so that I can take some pictures).
These crackers are perfect with the block cashew cheeze, or the walnut paste and with salad.


Ingredients
1 cup besan flour (you can also blend different gluten free flours to make up a cup, but be mindful that millet flour has a bitter taste.)
1 tsp baking powder
1/2 tsp pink salt
1 tsp olive or coconut oil
3 tbs water (4 if necessary)
1 tsp chia and 1 tsp flax seeds
you can also add chili, basil or rosemary flakes to switch it up2 s
2 sheets of parchment/wax paper
a flat baking tray or pizza pan
butter knife or pizza roller
rolling pin
Method:
1. Mix the dry ingredients in a large bowl.
2. Add the oil and slowly add the water until a very thick dough forms. Knead the dough until it is soft and smooth. Sprinkle more flour into the bowl and coat the ball.
3. Tear out two sheets of wax paper. Make them long enough to cover your baking tray as the crackers will be lifted and placed onto the baking tray with the wax paper.
4. Sprinkle flour onto the bottom wax paper and then place the ball of dough, flatten the ball and coat with flour. Place the top sheet of wax paper and using rolling pin, flatten the dough.
This part will take a while, as you try to make the dough as flat and even as possible, about 1/8 thickness. I usually remove the top wax sheet after a while, sprinkle more flour on top and then roll again without the wax until it is as flat as possible.

5. Using a pizza cutter or bread knife or dinner knife slice the dough into the cracker shapes you wish. Be sure not to cut the wax paper underneath too!

6. Lift the wax paper onto the baking sheet. Place in the oven, top rack. The oven should be at 150-200 C. You don't want it to be too hot or they will burn quickly.
Bake for 10-15 minutes until the crackers are golden brown around the edges. Remove from the oven and allow to cool considerably.
7. Pull the crackers from the wax paper carefully.
8. Store in an airtight container or mason jar for proper freshness, when FULLY COOL. I keep mine on the counter top and they last about 5-6 days. You can toast lightly if they feel a little soft.

I hope you like this one. It's a Womb or period or fibroid -friendly meal as well because it lacks wheat.
Please leave a comment or review below when you try this! Let me know how you put your own spin on it! Tag me on Instagram so I can see your yummy crackers @italpeople.
Love
Ila
Sunday, 9 February 2020
Eggless Besan Quiche
Greetings!

This recipe is one of my Sunday Prep meals along with my new Blender Blackbean Burger recipe, both eaten with a salad. My kingman and I are giving up bread so instead of eating with bread we substitute with a side salad of lettuce, tomato, cucumber and seeds (pumpkin, chia, hemp and sunflower).
I found the basics for this recipe on Pinterest, but I added a few powdered spices to give it more flavour as salt alone just simply will not do for a savoury flour like besan/garbanzo/chick pea!
Here are some tips I discovered over the last month or so making these weekly:
*Allow the batter to sit for a while, that allows the flax and besan to work on creating a thick batter, You don't want it to be too wet. The longer it rests the least likely it will not cook in the centre.
*A foil container to bake the quiche in works much better than regular tins which can cause the quiche to stick, but once you get the temperature right (low) sticking should not be a problem.
*Filling a pie dish with only a cup of the batter, or any dish beside a muffin tin will cook quickly and avoid the inside not cooking. The deeper the batter the longer it takes for the inside to cook.
*To store the finished quiche, line your air-tight container at the bottom with paper towel, then each layer of quiche with paper towel, and the top, because you want to absorb any moisture that will form in the fridge.
* You need 18 muffin holes or 3 muffin pans to make all muffins. I use 2 muffin pans and 1 pie pan or bread pan for the remaining batter which is about a cup of batter. Or I use 3 pie foil pans and 1 bread foil pan. I bake this one batch in multiple containers so that I have enough pieces to stretch from Monday to Friday.
*Oil the pans generously as the batter will stick easily as it cooks!
Ingredients
Batter:
1 3/4 cup besan/garbanzo flour
1/4 cup nutritional yeast
1 tsp baking powder
1 tsp garlic powder
1 tsp dried basil flakes
3/4 tsp pink salt
1/2 tsp cumin powder
1/2 tsp turmeric powder
1/2 tsp paprika
1 flax egg (1 tbs flax meal and 3 tbs boiling water)
2 1/4 cup water
Veggies:
3/4 cup canned corn (optional but my daughter likes it and I am working on getting her into more vegan foods)
1 cup finely chopped bell pepper usually 1 big one or 2 smaller ones
1/2 a zucchini finely diced
2 leaves of greens finely chopped (optional, i don't always include)
1/2 red onion finely chopped
chives finely chopped
1/2 finely grated carrot
*You can change your veggies as you desire but about 3/4 cup of each is good.
Oil for your baking pans *remember to coat them well*
Method:
1. In a large bowl, whisk together the dry ingredients: the besan flour, nutritional yeast, baking powder, salt, cumin, turmeric, garlic, basil, paprika and any other seasonings you use.
2. Mix the flax egg and let fluff up or turn gooey. With the whisk add it to the batter mixing it completely in, and ALLOW TO SIT WHILE you prepare the veggies.

4. Finely chop all your veggies and add them to the batter and whisk together again.
5. Oil your baking pans well. The spray oil can works best. Using a 1/4 cup measure, scoop the batter into each muffin hole. If using a pie or bread pan, use a 1 cup measure. Using the measuring cups REALLY help get the most out of your batter.


6. Bake on top rack at a low-medium heat, 150 C or 300 F. Bake for 30 minutes, 35 the most for muffins especially.
A toothpick inserted in the centre should not be wet but a bit of the quiche will be on it.
7. Remove from oven and allow the quiche to COMPLETELY COOL which will also thicken the centre properly.

8. Toast to reheat as necessary.


I really hope you fulljoy this recipe as I surely do and my family - minus my son who isn't a fan of the savory flavours. This one was a big win with my daughter who is a very picky eater and is transitioning from dairy in her diet (Our eating habits were always meatless but included dairy when she was born and younger so it has been a struggle to get her on board with our dairy-free livity over the years. And now that I am trying to go as gluten-free as possible that is a whole other fight! But don't sweat it if you have this issue too, as the older they get, the more they want to eat and they tend to try the alternatives willingly!)
If you try this recipe please leave a comment, even your variation! And if you post a picture on Instagram, tag me @italpeople.
Also, if you have a recipe to share email italpeople@gmail.com and I will post.
Thursday, 11 April 2019
Turmeric Tonic
Greetings,
Here's a quick recipe for a Turmeric Tonic that you should take daily - in the morning and before bed, to help cleanse your organs, boost immunity and alleviate digestion issues. It is not completely vegan, so you can change it to suit your needs.
4 cups of boiled water, allowed to cool or any drinking water
1 tsp powdered turmeric (or a thumb of turmeric, grated and steeped in the hot water)
1/4 cup of honey
1/4 cup of apple cider vinegar
1/8 tsp cayenne pepper powder
I also add sometimes:
1/2 thumb of ginger (grated and steeped in the hot water, then strained)
1 clove garlic (grated and steeped in the hot water, then strained)
Method:
Basically, you heat the water and allow it to cool, and then add all the ingredients and stir.
If you are using the raw turmeric, ginger or garlic, put them in while it is hot and then sieve them out.
Store the tonic in a glass jar if possible. It will last for at least a week but it should be done before then. Stir before pouring.
There are numerous health benefits for the brain, heart, kidneys and liver so I really recommend making this tonic a daily routine in your household!
Friday, 1 March 2019
Lentil Pie or Loaf and Shepherd's Pie
Greetings,
Today's recipe is my recent creation, and one that my entire family enjoys every week - which is a rare thing as my children, mostly my daughter, are very picky eaters.
I will be giving two recipes, one for the lentil base which can be a pie on its own, and the other for the shepherd's pie, which is really just the addition of ground provision on top of the lentil base.
Now for a big dish you can use 1.5 cups of lentils, for a small dish 1 cup. My big dish is oval at 14x10 inches wide and the small is 10x8 inches wide. They are both 2 inches deep.
Lentil Pie or Loaf
1 or 1.5 cups lentils (the brown kind)
1 small onion
1 pimento pepper (optional)
4 chives
2 garlic cloves
1.5 tbsp flax meal (ground flax seeds)
1/4 cup quinoa or chickpea flour (any flour you desire)
1/8 cup nutritional yeast
1/2 tsp ground seasonings: turmeric, cumin
salt
tomato paste
cooking oil of choice
1/4 eggplant (optional, you can also use another vegetable like carrot)
baking dish large or small
colander/strainer
Method:
Soak the lentils in a dish for at least an hour so that they will take very little time to cook.
Cook them until they are soft. Remove from heat and throw into the strainer/colander with a bowl underneath to capture the water. Give it a stir or two to get the water out.

Finely dice the onion, pimento and chives (or celery as in my pic below, seasons are to your taste). Grate the garlic. Slice the eggplant into circles then cube each layer.

Transfer the strained lentils to a large mixing bowl, and using a fork, mash the lentils until it become mushy - do NOT mash ALL of the lentils, just mash enough to make it mushy which will help blend and hold together the ingredients.
Add the fresh and dried ingredients, salt, the flour, flax meal and nutritional yeast. Add one spoonful of tomato paste. Drizzle a little oil in. Take the water that you strained off, which would have settled, and pour off the top layer until you get a lentil sludge at the bottom of the bowl. Add this to the other ingredients and stir everything.

Grease the pan with a little oil and spread a 1 inch layer of lentils. Flatten with a spoon. Add some more tomato paste for the top layer and spread it all over evenly, then sprinkle more nutritional yeast.

Bake at a medium heat on top shelf for about 20-30 minutes. I don't usually go by a time, to be honest, I take out the pie when all around the edges are dark brown and have pulled away from the dish, that means the bottom is brown as well.
Allow to cool away from heat so that the pie will firm up.
If you allow it to cool all the way it will be quite firm and easy to cut and serve.

As a bonus, you can also grease a muffin tin and pack the lentil mixture into it to make separate servings. When I do the muffins I smash them and then put it in a sandwich with lettuce, tomato and cucumber.


Shepherd's Pie
Follow the same method for the lentil pie.
You will need potatoes or breadfruit, dasheen or yam for the top.
Make a mash potato (or other ground provision) with a little coconut milk, turmeric and salt and butter if you use it. After you spread the lentil base and tomato paste then spread the mashed potato same way. Then sprinkle with nutritional yeast again which replaces cheese.
Base same way, take out when the edges have darkened and pulled away from the dish.
Cool and then use a knife to carve out serving sized pieces.


This is guaranteed to be a recipe you make every week for the family! Perfect for Sunday.
Today's recipe is my recent creation, and one that my entire family enjoys every week - which is a rare thing as my children, mostly my daughter, are very picky eaters.
I will be giving two recipes, one for the lentil base which can be a pie on its own, and the other for the shepherd's pie, which is really just the addition of ground provision on top of the lentil base.
Now for a big dish you can use 1.5 cups of lentils, for a small dish 1 cup. My big dish is oval at 14x10 inches wide and the small is 10x8 inches wide. They are both 2 inches deep.
Lentil Pie or Loaf
1 or 1.5 cups lentils (the brown kind)
1 small onion
1 pimento pepper (optional)
4 chives
2 garlic cloves
1.5 tbsp flax meal (ground flax seeds)
1/4 cup quinoa or chickpea flour (any flour you desire)
1/8 cup nutritional yeast
1/2 tsp ground seasonings: turmeric, cumin
salt
tomato paste
cooking oil of choice
1/4 eggplant (optional, you can also use another vegetable like carrot)
baking dish large or small
colander/strainer
Method:
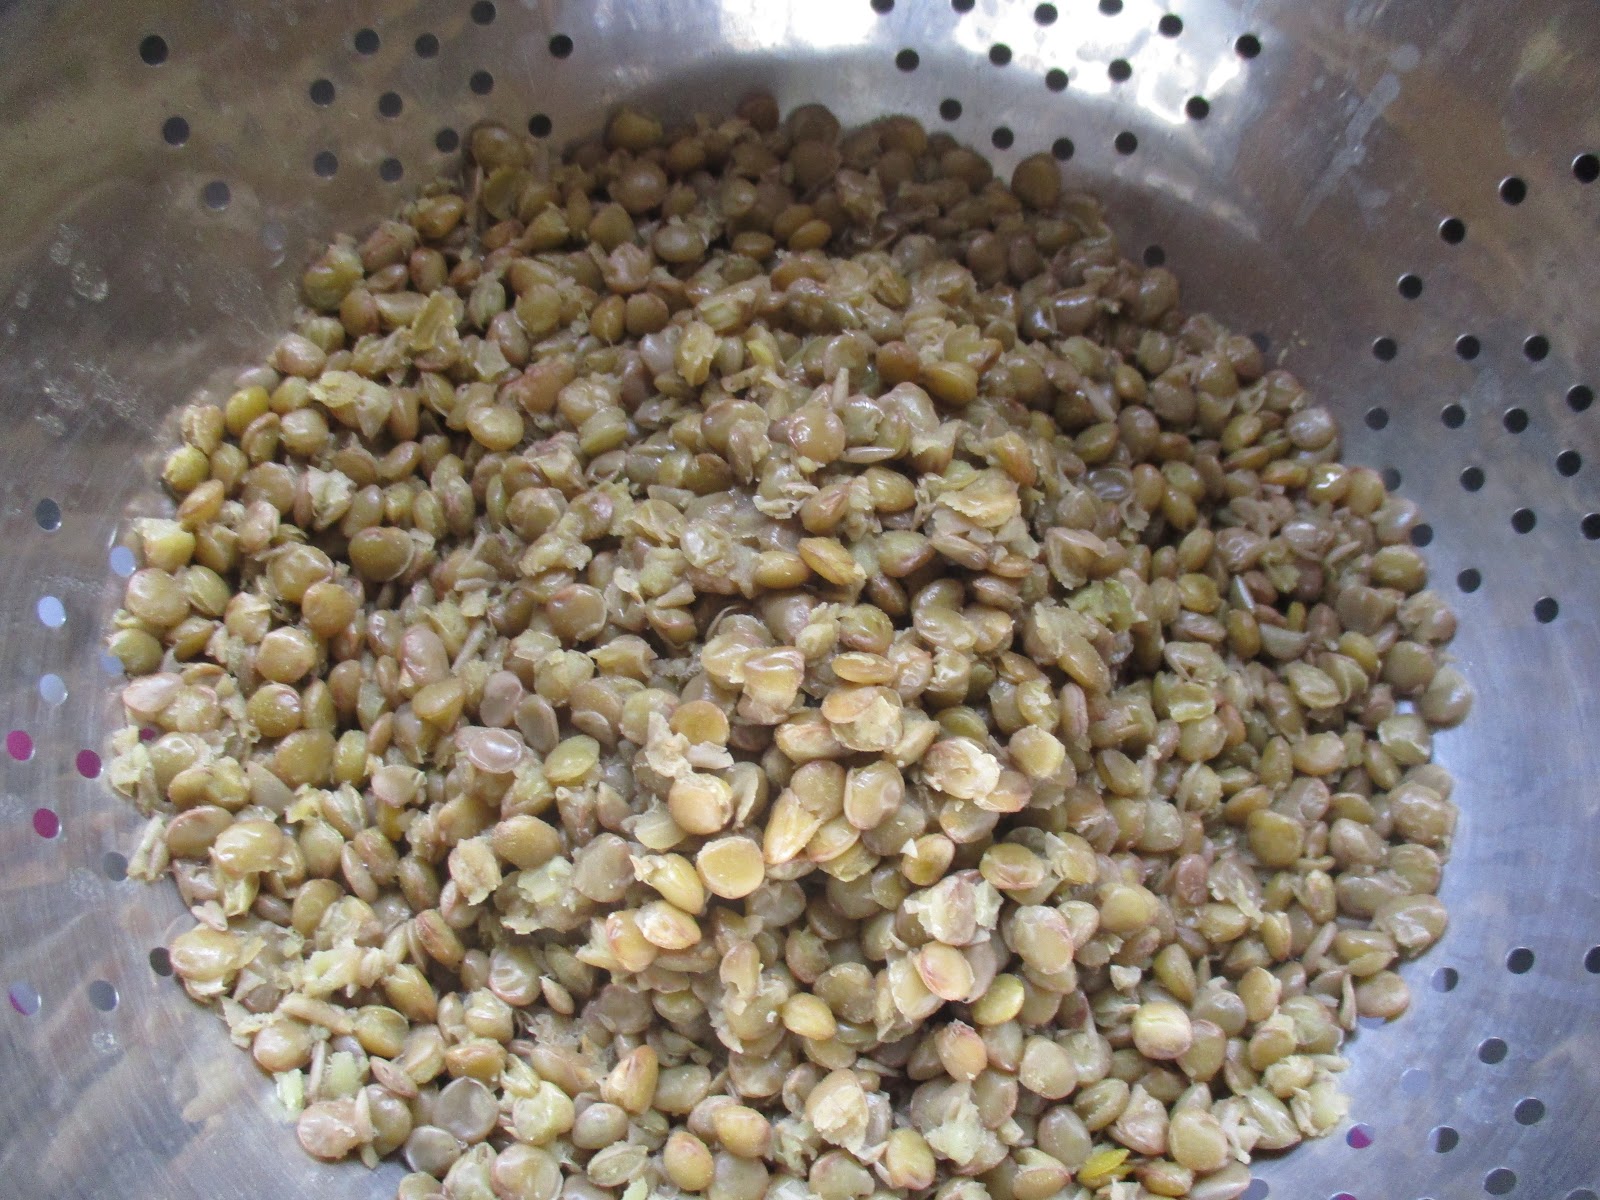
Soak the lentils in a dish for at least an hour so that they will take very little time to cook.
Cook them until they are soft. Remove from heat and throw into the strainer/colander with a bowl underneath to capture the water. Give it a stir or two to get the water out.
Finely dice the onion, pimento and chives (or celery as in my pic below, seasons are to your taste). Grate the garlic. Slice the eggplant into circles then cube each layer.

Transfer the strained lentils to a large mixing bowl, and using a fork, mash the lentils until it become mushy - do NOT mash ALL of the lentils, just mash enough to make it mushy which will help blend and hold together the ingredients.
Add the fresh and dried ingredients, salt, the flour, flax meal and nutritional yeast. Add one spoonful of tomato paste. Drizzle a little oil in. Take the water that you strained off, which would have settled, and pour off the top layer until you get a lentil sludge at the bottom of the bowl. Add this to the other ingredients and stir everything.

Grease the pan with a little oil and spread a 1 inch layer of lentils. Flatten with a spoon. Add some more tomato paste for the top layer and spread it all over evenly, then sprinkle more nutritional yeast.

Bake at a medium heat on top shelf for about 20-30 minutes. I don't usually go by a time, to be honest, I take out the pie when all around the edges are dark brown and have pulled away from the dish, that means the bottom is brown as well.
Allow to cool away from heat so that the pie will firm up.
If you allow it to cool all the way it will be quite firm and easy to cut and serve.

As a bonus, you can also grease a muffin tin and pack the lentil mixture into it to make separate servings. When I do the muffins I smash them and then put it in a sandwich with lettuce, tomato and cucumber.


Shepherd's Pie
Follow the same method for the lentil pie.
You will need potatoes or breadfruit, dasheen or yam for the top.
Make a mash potato (or other ground provision) with a little coconut milk, turmeric and salt and butter if you use it. After you spread the lentil base and tomato paste then spread the mashed potato same way. Then sprinkle with nutritional yeast again which replaces cheese.
Base same way, take out when the edges have darkened and pulled away from the dish.
Cool and then use a knife to carve out serving sized pieces.


This is guaranteed to be a recipe you make every week for the family! Perfect for Sunday.
Subscribe to:
Comments (Atom)